Type Project
Created Jun 14, 2026, 23:05:26 / Updated Jul 29, 2026, 17:44:40
Views — / Comments — / Words 3,390
Tags blog , Astro-star , project
介绍 Astro-star 博客主题的内容与部署
设计和建设,对我有着致命的吸引力,我热衷于好看的事物,也喜欢设计好看的事物,所以玩游戏也是建造派。而对一个网站的设计和建设,同样令我着迷。
我在大一快结束的时候,刷到了某学长的博客,顿时被其主题的优雅和美丽吸引,萌生拥有自己博客的想法,最终花了一周时间才部署上。
但是在前一个博客主题作者的逐步优化下,我越来越觉得它不符合我的审美,所以也产生尝试自己搭建博客的想法,在大三上学期开始学习 Astro,一边学习前端知识一边借助 AI 帮忙搭建这款主题 Astro-star

好看才会让人想用的,对吧?
你可以在 https://hanlife02.com 预览
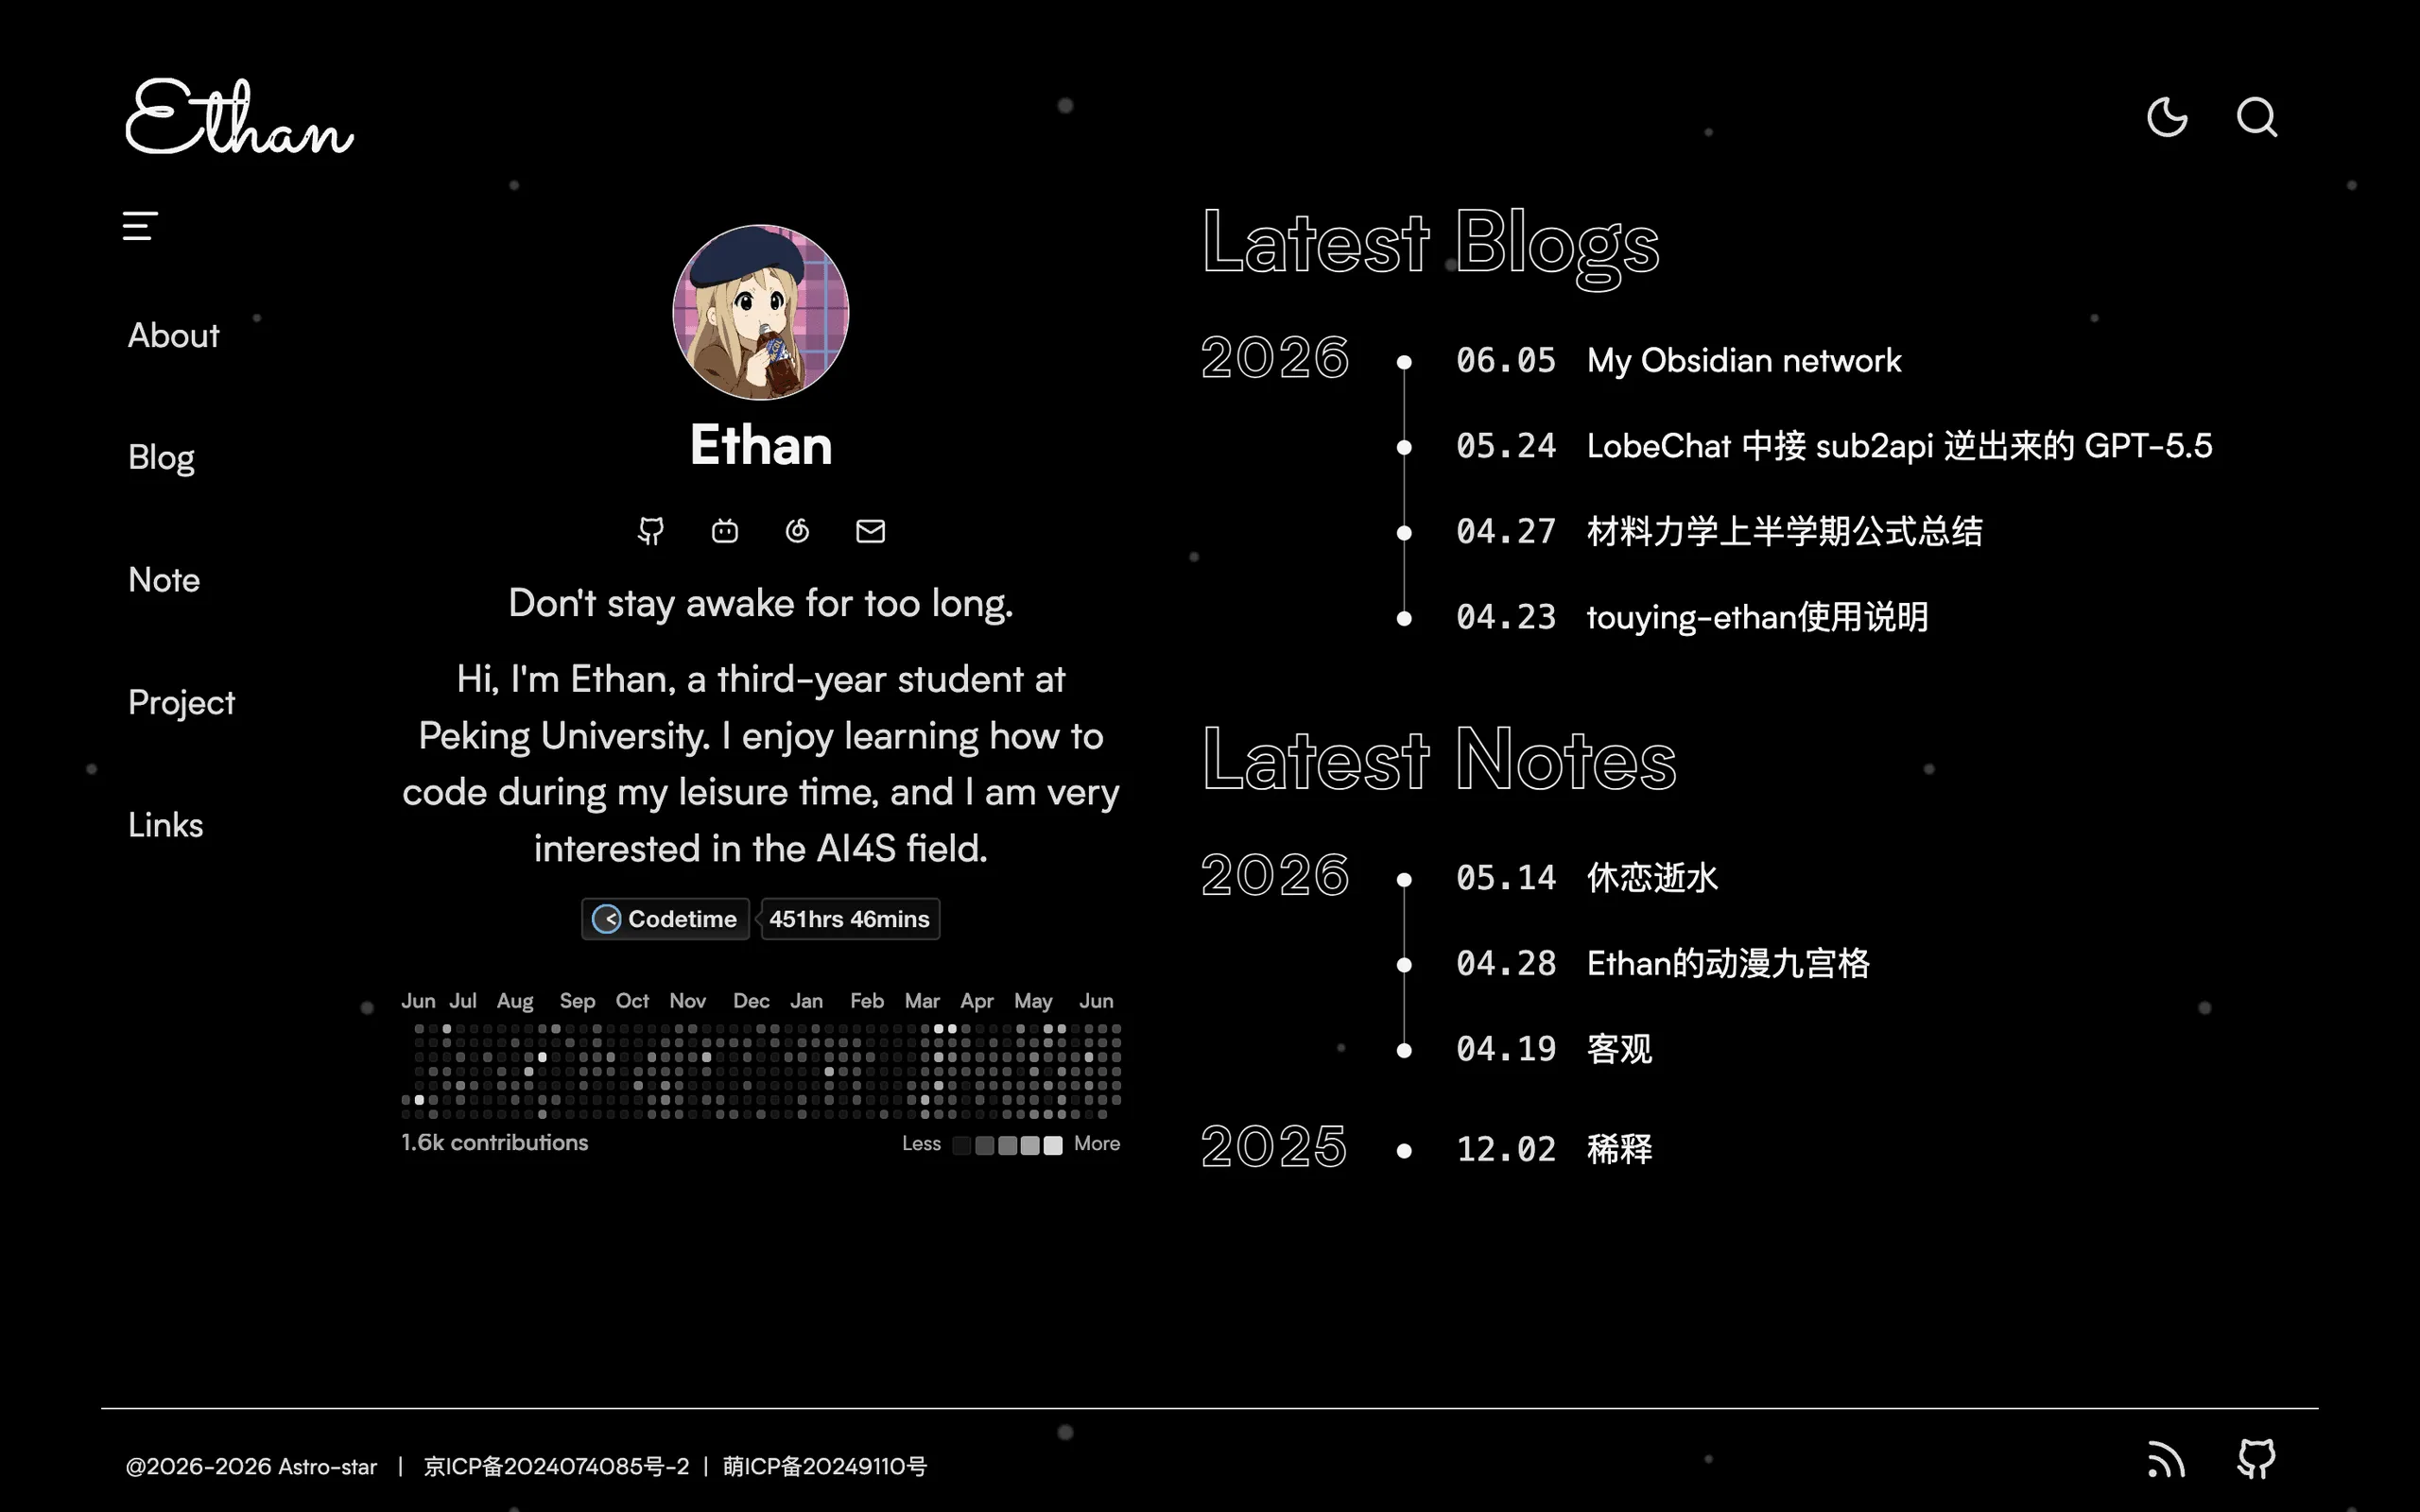
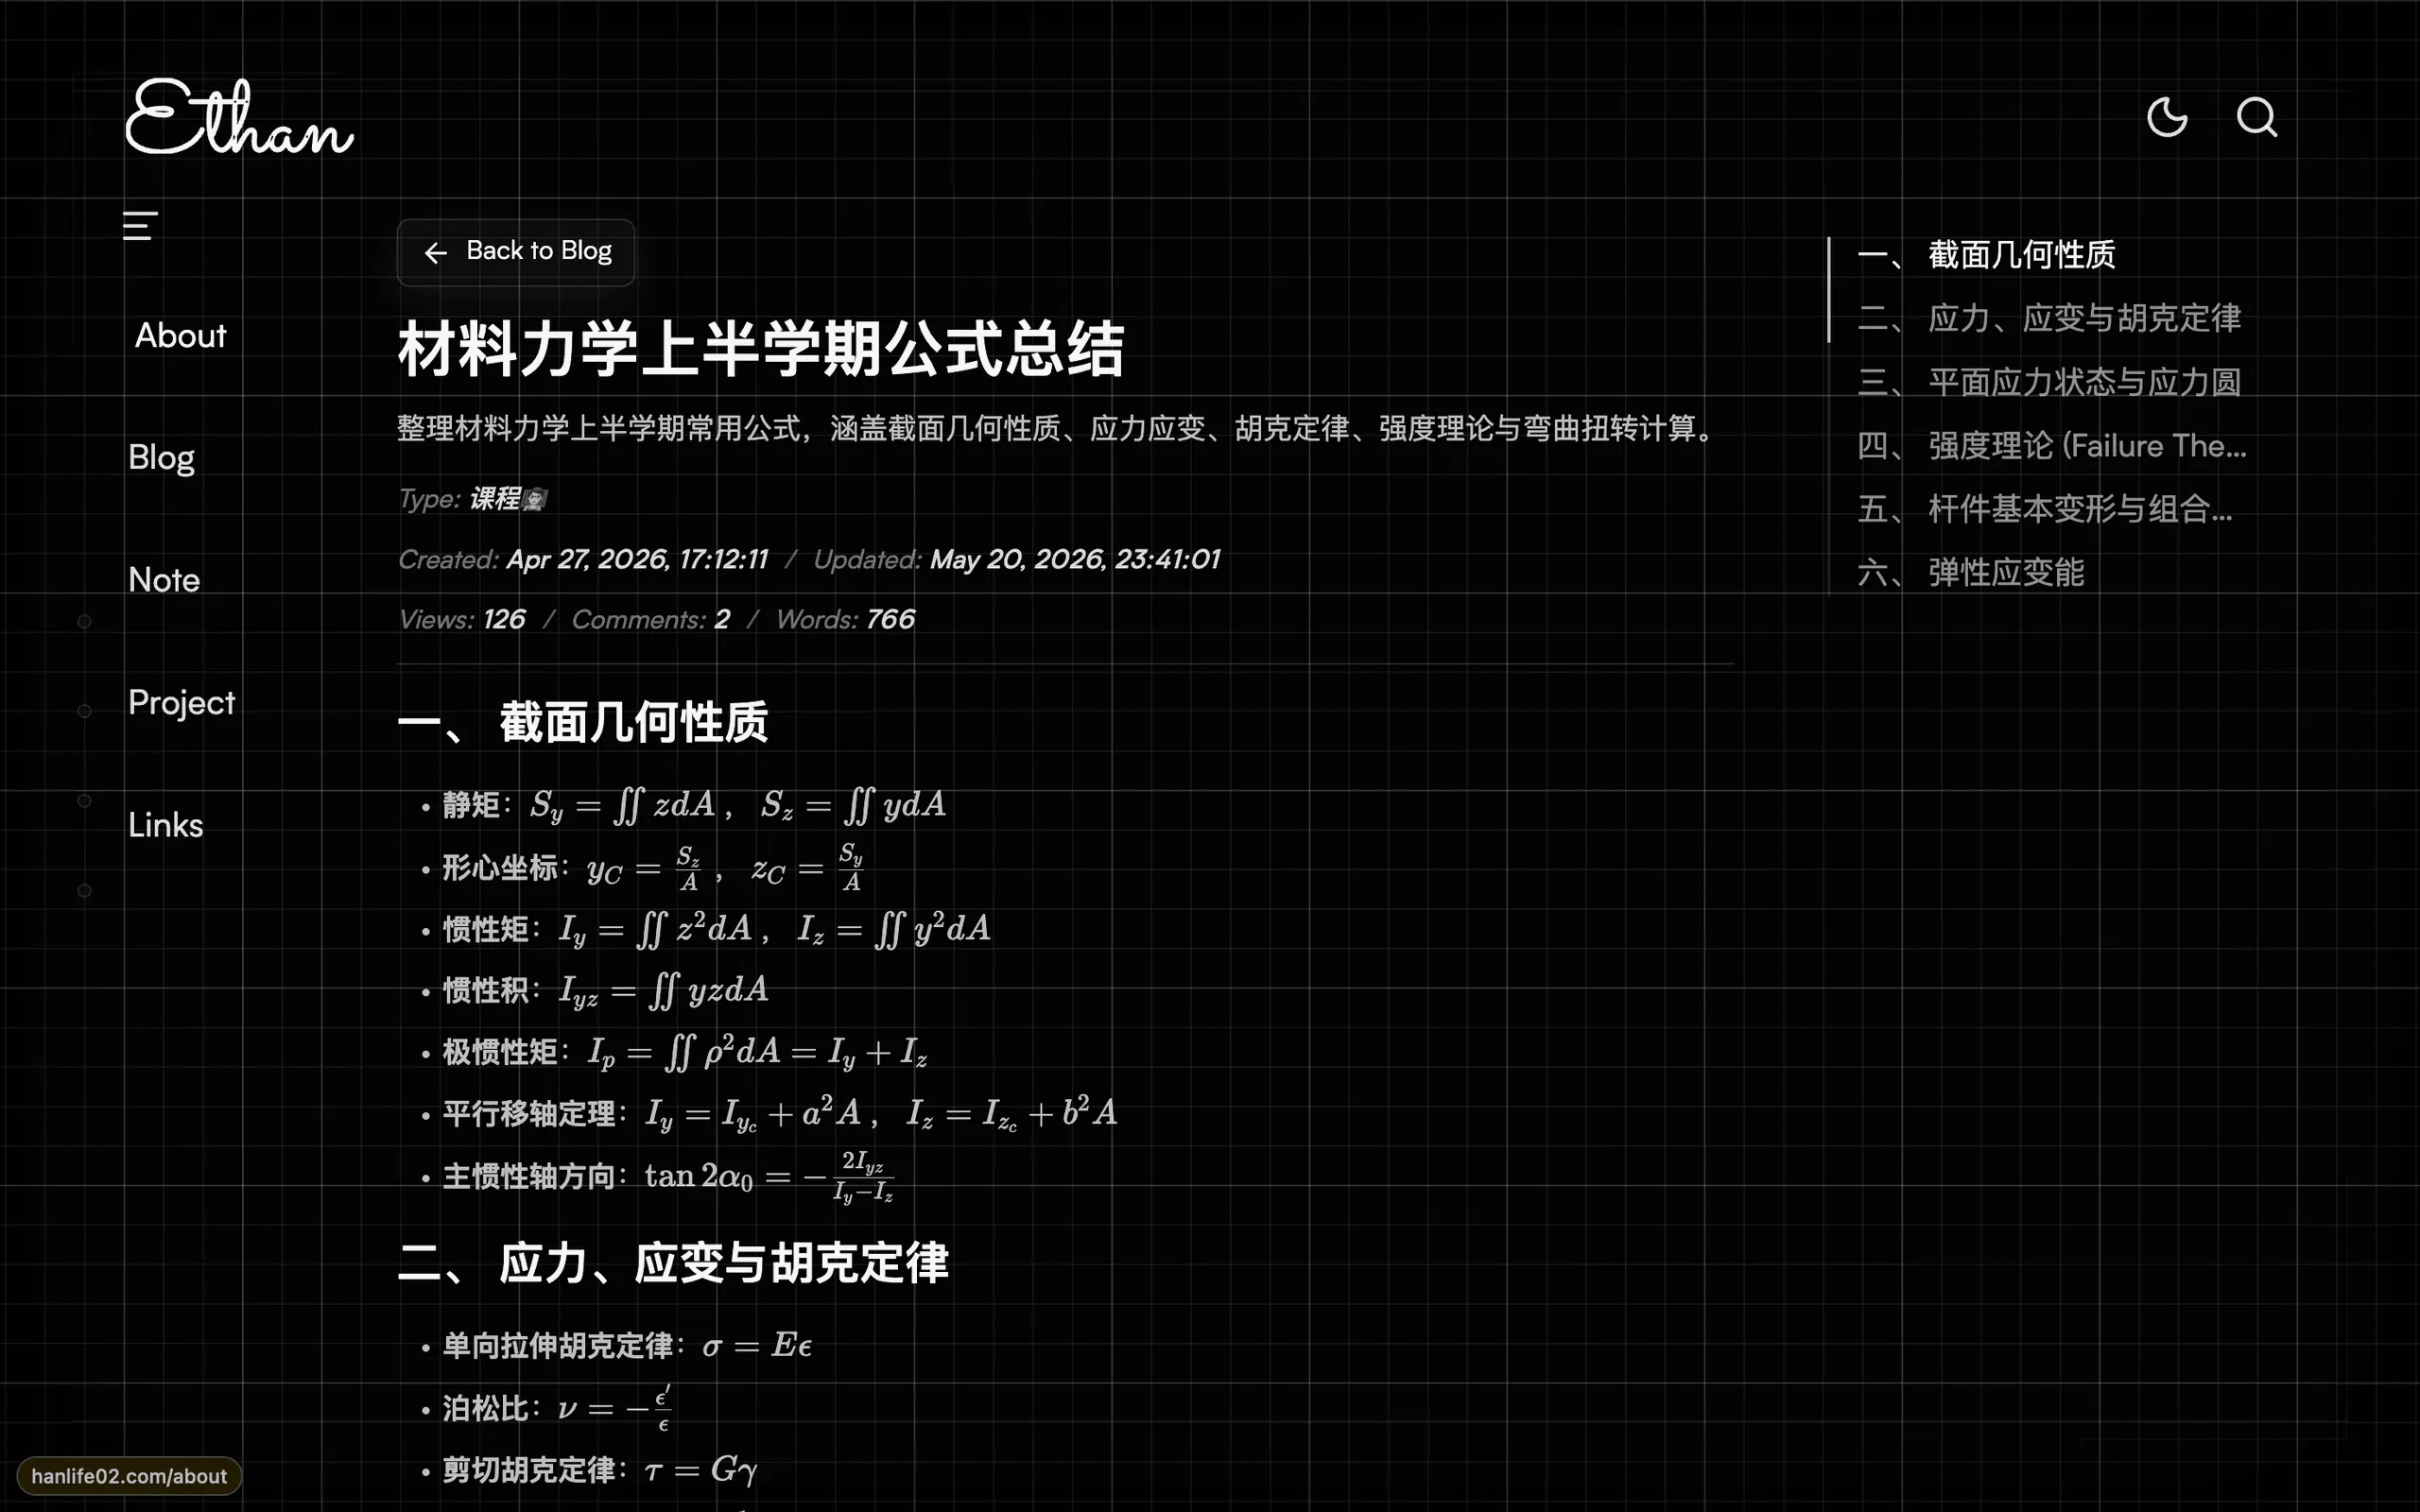
采用 md 或 mdx 文件,方便快速启动,后续会逐步添加新的样式在本文章更新~
[touying-ethan](https://github.com/hanlife02/touying-ethan)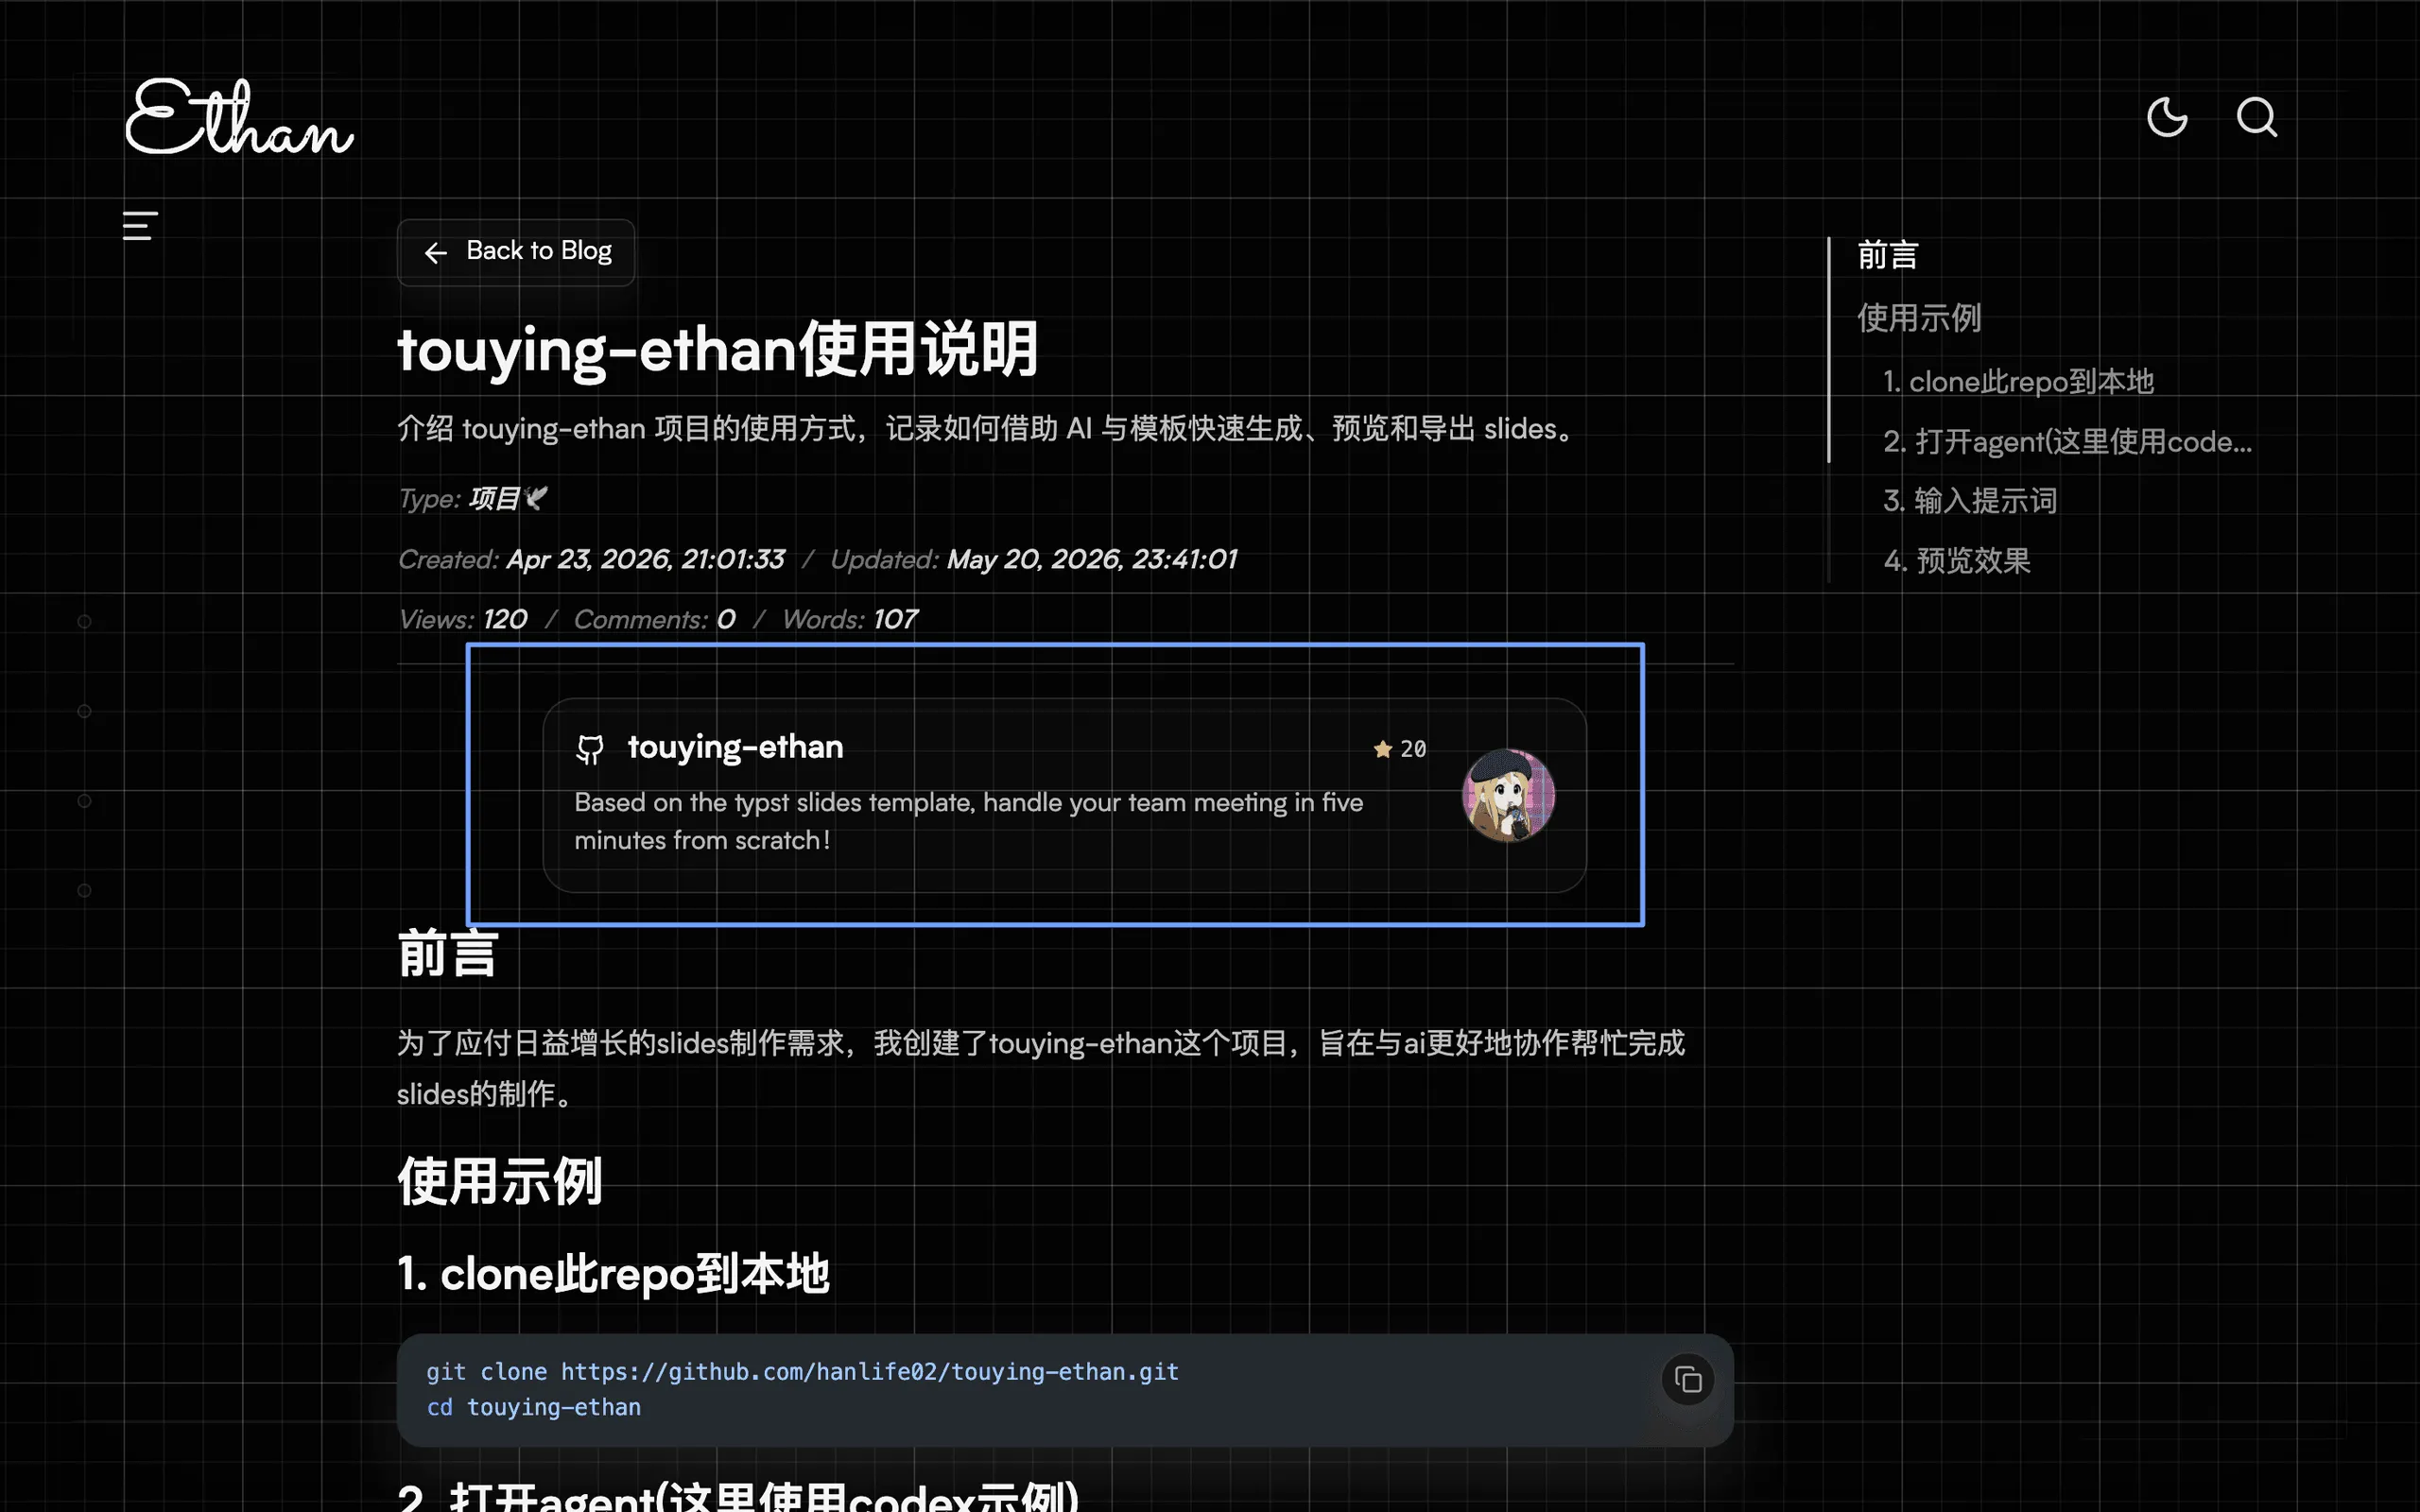

点击会展开/折叠,默认折叠/展开
:::fold[Click to expand]
Hidden content can include paragraphs, lists, and code blocks.
::::::fold[Open by default]{open=true}
This fold starts open, so the bottom-right corner is already placed at the end of the full content area.
:::
Hover to reveal ||this hidden inline note|| while reading.
~~muted deleted text~~
从 git log 里自动获取文章的创建日期和更新日期,也支持覆盖此时间自定义。
我设计了很多 Hover 的样式,为了让页面更有交互感,更加生动,减少生硬。你可以打开网站自行探索。
你可以直接从源码手动部署,也可以采用 GitHub Actions 自动部署,作者更推荐后者。
ssh username@host

git clone https://github.com/hanlife02/Astro-star.git
cd Astro-star

pnpm install参考配置与文章
安装依赖和修改配置后,可以先在服务器上做一次检查和构建:
pnpm check
pnpm build
构建成功后,Astro 会在 dist/ 下生成服务端入口。本项目已经提供 ecosystem.config.cjs,可以直接用 PM2 启动:
pm2 start ecosystem.config.cjs
pm2 save
默认端口是 4321。如果想换端口,可以在启动前指定 PORT:
PORT=3000 pm2 start ecosystem.config.cjs
pm2 save
常用运维命令:
pm2 status
pm2 logs Blog
pm2 restart Blog
pm2 stop Blog
如果只是本地临时预览,不需要 PM2,可以使用:
pnpm dev开发服务默认地址通常是:
http://localhost:4321# 'your-github-username'修改为你的github用户名,或者你可以直接在fork后的repo里找到地址
git clone https://github.com/your-github-username/Astro-star.gitgit add .
git commit -m "build my blog"
git pushActions 执行完成后即顺利部署
如果只是本地预览,环境变量可以先不填;如果要部署成正式站点,建议在项目根目录创建 .env,按需填写下面这些变量
# Waline 评论服务地址;不填时评论入口会隐藏或不可用
WALINE_SERVER_URL=https://comment.example.com

# GitHub API token;仅供服务器上的仓库卡片接口使用,避免匿名请求限流
GH_TOKEN=github_pat_xxxxxxxxxxxxxxxxxxxx

# CodeTime token;用于 CodeTime 徽章接口
CODETIME_TOKEN=xxxxxxxx-xxxx-xxxx-xxxx-xxxxxxxxxxxx

# Algolia 索引同步用;只有运行 pnpm algolia:sync 时才需要
ALGOLIA_WRITE_API_KEY=xxxxxxxxxxxxxxxx
ALGOLIA_ADMIN_API_KEY=xxxxxxxxxxxxxxxx注意不要把真实密钥提交到公开仓库。.env 只放在服务器或自己的私有分支里。
这里的 GH_TOKEN 是 Astro 服务运行时读取的可选变量,只用于 GitHub 仓库卡片的 REST API 请求。它不是 GitHub Actions 自动提供的 ${{ github.token }},也与下面用于跨仓库操作的 ACTIONS_PAT 无关;不配置时仓库卡片会使用匿名请求和页面回退逻辑。
进入 fork 后的仓库:Settings -> Secrets and variables -> Actions。
非敏感部署参数放在 Variables 里。
| Variable | 是否必填 | 默认值 | 说明 |
|---|---|---|---|
SSH_USER | 可选 | ubuntu | SSH 用户名。 |
SSH_PORT | 可选 | 22 | SSH 端口。 |
DEPLOY_PATH | 可选 | ~/Astro-star | 服务器部署目录。确保 SSH 用户对该目录有读写权限。 |
PM2_APP_NAME | 可选 | Astro-star | PM2 应用名。 |
APP_PORT | 可选 | 4321 | 站点运行端口,会作为 PORT 传给 ecosystem.config.cjs 启动 Astro。 |
凭证、token 统一放在 Secrets 里:
| Secret | 是否必填 | 用途 | 说明 |
|---|---|---|---|
SSH_HOST | 必填 | SSH / rsync 部署 | 服务器公网 IP 或能够直连 SSH 端口的域名。 |
SSH_PRIVATE_KEY | 必填 | SSH / rsync 部署 | 用于登录服务器的私钥内容。对应公钥需要提前加入服务器用户的 ~/.ssh/authorized_keys。 |
WALINE_SERVER_URL | 可选 | 构建和服务器 .env | Waline 评论服务地址;不使用评论可以不填。 |
GH_TOKEN | 可选 | 服务器 .env | 独立只读 PAT;以同名变量写入 .env,供仓库卡片 REST API 使用。 |
CODETIME_TOKEN | 可选 | 服务器 .env | CodeTime 徽章接口 token;不使用可以不填。 |
ALGOLIA_WRITE_API_KEY | 可选 | Algolia 索引同步 | Algolia 写入索引用的 key;只有启用搜索索引同步时才需要。 |
ALGOLIA_ADMIN_API_KEY | 可选 | Algolia 索引同步 | Algolia 管理 key;用于清理已经删除文章对应的旧记录。 |
ACTIONS_PAT | 可选 | 跨仓库或分支写操作 | 普通 fork 无需配置;仅上游维护者同步 main -> Ethan、触发独立文档仓库时需要。 |
GitHub Actions 每次运行都会自动提供 ${{ github.token }},它不需要手动创建,也不会显示在仓库 Secrets 列表中。普通 fork 的同仓库检出和服务器部署会直接使用这个自动 token。若希望自动部署后的仓库卡片使用认证请求,应额外创建独立的只读 PAT,保存为 GH_TOKEN;部署工作流会以同名变量写入服务器 .env。
只有工作流需要向其他仓库发起操作,或者把提交推送到受保护分支时,才需要手动创建 ACTIONS_PAT。本项目上游维护场景需要将 Astro-star 与 Astro-star-docs 加入 token 的仓库范围,并授予目标操作所需的 Contents: Read and write 与 Actions: Read and write 权限。ACTIONS_PAT 只供 Actions 使用,不会写入服务器 .env。技术上可以把同一个 PAT 同时填入两个 Secret,但这会把仓库写权限长期暴露在服务器上,因此不应合并。
站点的主要配置集中在 src/config/ 目录。新用户通常先改这四个文件:
src/config/site.ts:站点名、域名、描述、头像、作者信息、导航、备案信息、版权协议、打赏二维码。src/config/social.ts:邮箱、GitHub、Bilibili、Telegram 等社交链接。把不用的链接设置为 enabled: false,或者直接替换为自己的地址。src/config/links.ts:友链页信息,包括站长自己的友链申请信息、友链列表和失联链接列表。src/config/search.ts:Algolia 站内搜索配置。不使用 Algolia 时保持空字符串即可。最先要确认的是 site.site.url,它会作为 Astro 的 site 配置参与 canonical URL、RSS、sitemap 等生成。正式部署前应改成自己的域名,例如:
export const site = {
  profile: {
    name: "Your Name",
    email: "hello@example.com",
    githubUsername: "your-name",
    avatarSrc: "/avatar.svg",
    bio: "A short line about you.",
  },
  site: {
    name: "Your Site Name",
    url: "https://example.com",
    description: "A short description for your personal site.",
    iconSrc: "/site-icon.svg",
  },
};
本地静态资源放在 public/ 下,引用时从根路径开始写。例如头像放在 public/avatar.svg,配置里写 /avatar.svg。
文章图片则不要放进 public/——那里的文件原样直出、不经压缩。原图放在文章所在分类目录的 images/ 子目录,在 Markdown 中用相对路径写 ,构建时会自动转成 webp 并注入宽高,dist/ 里只保留压缩产物。public/figures/ 只留配置里引用的友链头像。
文章和页面内容集中在 src/content/ 目录,支持 .md 和 .mdx:
src/content/blog/:博客文章。src/content/note/:短笔记、想法、阅读记录。src/content/project/:项目展示页。src/content/page/:固定页面,例如 about 和 links。博客、笔记和项目都可以按文件夹分类,例如:
src/content/blog/template/welcome-to-astro-star.mdx
src/content/note/thoughts/first-note.mdx
src/content/project/astro-star-template.mdx
内容条目的 frontmatter 都可以省略,省略后会使用文件路径、文件名、正文内容或 Git 时间等信息兜底;但为了 URL、列表页和 SEO 更稳定,建议主动填写。
博客或笔记示例:
---
routeSlug: "my-first-post"
title: "My First Post"
description: "A short summary shown in list pages and metadata."
createdAt: "2026-06-15 23:05:26"
updatedAt: "2026-06-15 23:30:00"
type: "Blog"
published: true
---

# My First Post

Write your article here.
项目示例:
---
routeSlug: "my-project"
title: "My Project"
description: "A short project description."
createdAt: "2026-06-15 23:05:26"
projectUrl: "https://github.com/your-name/my-project"
docUrl: "https://example.com/docs"
published: true
---

# My Project

Write your project introduction here.
常用字段说明:
routeSlug:URL 使用的稳定短名,建议只用英文、小写和连字符。title:文章、笔记或项目标题。description:摘要,会用于列表页和 SEO 信息。createdAt:创建时间,省略时会优先从 Git 记录读取创建时间,再回退到文件系统时间;需要手动覆盖时再显式填写,格式示例:"2026-06-15 23:05:26"。updatedAt:更新时间。省略时同样会从 Git 记录或文件系统时间回退;格式示例:"2026-06-15 23:30:00"。type:文章分类或标签性质的展示字段。projectUrl:项目地址,仅项目页会展示为 GitHub 圆形图标链接。docUrl:项目文档地址,仅项目页会展示为文档圆形图标链接。image:社交分享图/SEO 图,可写 ./images/xxx.png;留空时自动取正文第一张图。published:设置为 false 时可作为草稿隐藏。固定页面放在 src/content/page/,常见字段如下:
---
title: About Me
heading: About
description: This page introduces me and this site.
background: code-rain
---

## About Me

Write your page content here.
写完配置和文章后,建议运行:
pnpm check
pnpm build
如果构建失败,优先检查 frontmatter 字段是否缺失、日期是否写成字符串、图片路径是否存在,以及 MDX 语法是否闭合。
Astro 服务默认监听 4321 端口。正式部署时不要让访客直接访问这个端口,而是让 Nginx 接收域名的 80/443 请求,再转发到本机 Astro 服务:
访客 -> Nginx :443 -> Astro/PM2 :4321配置前先确认:
A 记录已经指向服务器公网 IP。curl -I http://127.0.0.1:4321 能收到响应。4321 不需要向公网开放。在 网站 -> 网站 -> 创建网站 -> 反向代理 中填写:
| 配置项 | 示例 |
|---|---|
| 主域名 | example.com |
| 代理地址 | http://127.0.0.1:4321 |
| Host | $host |
保存后访问 http://example.com,确认能显示博客,再继续配置证书。若使用了 www.example.com,需要同时添加域名解析,并把它加入网站的其他域名。
没有使用面板时,可以创建一个站点配置:
server {
    listen 80;
    listen [::]:80;
    server_name example.com www.example.com;

    location / {
        proxy_pass http://127.0.0.1:4321;
        proxy_http_version 1.1;
        proxy_set_header Host $host;
        proxy_set_header X-Real-IP $remote_addr;
        proxy_set_header X-Forwarded-For $proxy_add_x_forwarded_for;
        proxy_set_header X-Forwarded-Proto $scheme;
    }
}
启用配置后检查并重载 Nginx:
sudo nginx -t
sudo systemctl reload nginx
如果返回 502 Bad Gateway,先检查 pm2 status 和 curl -I http://127.0.0.1:4321。本机端口无法访问通常说明 Astro 未启动或 APP_PORT 与反向代理填写的端口不一致。
推荐使用受浏览器信任并可自动续期的 Let’s Encrypt 证书。使用 1Panel 时,进入网站的 HTTPS 设置,申请 ACME/Let’s Encrypt 证书并开启 HTTPS;申请成功后再开启“HTTP 跳转 HTTPS”。
没有使用面板时,可以安装 Certbot,并让它自动修改已启用的 Nginx 配置:
sudo certbot --nginx -d example.com -d www.example.com只申请实际已经解析到服务器的域名;没有使用 www 时去掉对应参数。完成后验证自动续期:
sudo certbot renew --dry-run最终的 HTTPS 配置应包含证书路径,并把 HTTP 请求重定向到 HTTPS。下面是结构示例,具体证书路径以 Certbot 或 1Panel 生成的配置为准:
server {
    listen 80;
    listen [::]:80;
    server_name example.com www.example.com;
    return 301 https://$host$request_uri;
}

server {
    listen 443 ssl http2;
    listen [::]:443 ssl http2;
    server_name example.com www.example.com;

    ssl_certificate /etc/letsencrypt/live/example.com/fullchain.pem;
    ssl_certificate_key /etc/letsencrypt/live/example.com/privkey.pem;

    location / {
        proxy_pass http://127.0.0.1:4321;
        proxy_http_version 1.1;
        proxy_set_header Host $host;
        proxy_set_header X-Real-IP $remote_addr;
        proxy_set_header X-Forwarded-For $proxy_add_x_forwarded_for;
        proxy_set_header X-Forwarded-Proto $scheme;
    }
}
配置完成后依次验证源站服务、HTTPS 和跳转:
curl -I http://127.0.0.1:4321
curl -I http://example.com
curl -I https://example.com
预期结果是 Astro 本机端口返回正常响应,HTTP 域名返回 301 或 308 跳转,HTTPS 域名返回 200。
 微信
微信  支付宝
支付宝
Comments
Notes, questions, and follow-ups are welcome here.